Location
Europe
Asia Pacific
Others
By using this website you agree to our use of cookies. If you require more information or prefer not to accept cookies please visit our Privacy Policy >
How to Update Your BIOS
Part 2:Q-Flash and BIOS Recovery
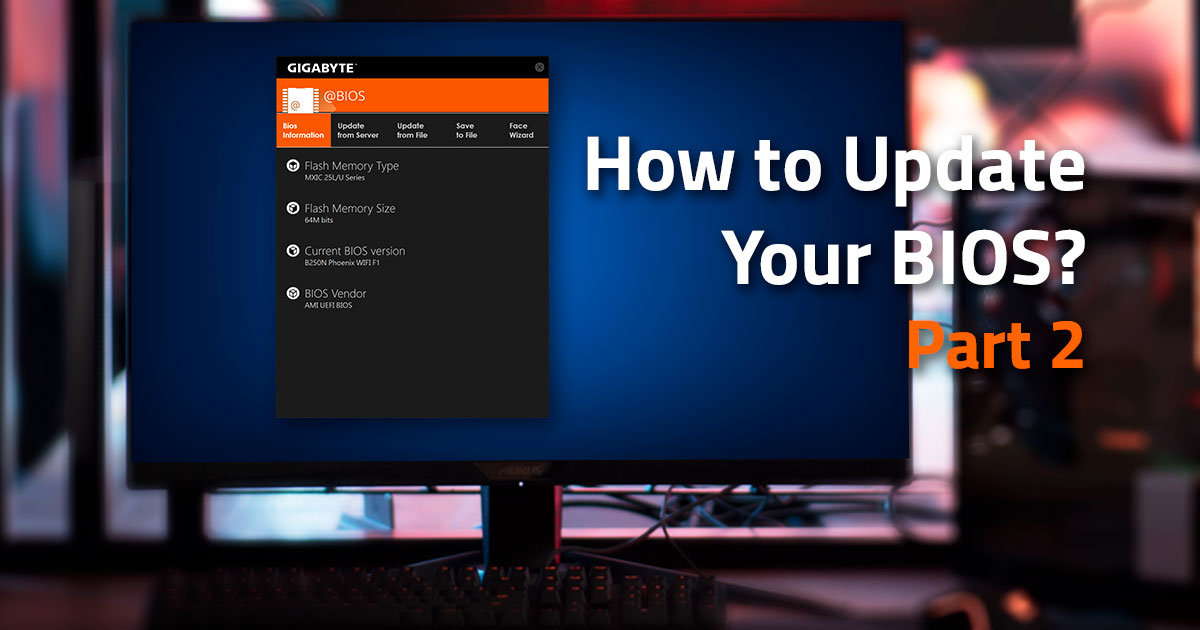
In Part 2 we looked at how to use the @BIOS update utility for updating your BIOS. Although @BIOS is the most user-friendly way to update your motherboards BIOS, a lot of people prefer the option of accessing the BIOS itself to perform the update.
This is where Q Flash comes in.
Using Q Flash, you can run the update from within your motherboards bios. The benefit of this is that it removes Windows from the update process, which can help make the update a bit safer.
Here is how to update your BIOS through Q Flash.
Step 1: Download the BIOS update
First things first, head on over to the product page for your AORUS motherboard and download the compressed file for the latest BIOS update. It is important to double-check that you have downloaded the correct BIOS version for your motherboard model.
Step 2: Prepare your USB drive
Now that you have downloaded the latest BIOS update, it is time to prepare your USB drive. Ensure that your drive is formatted as FAT32.
Open the compressed BIOS update file that you downloaded and extract the content to the root of your USB drive.
Once the files have been copied across, plug the USB drive into a spare USB slot on your computer.
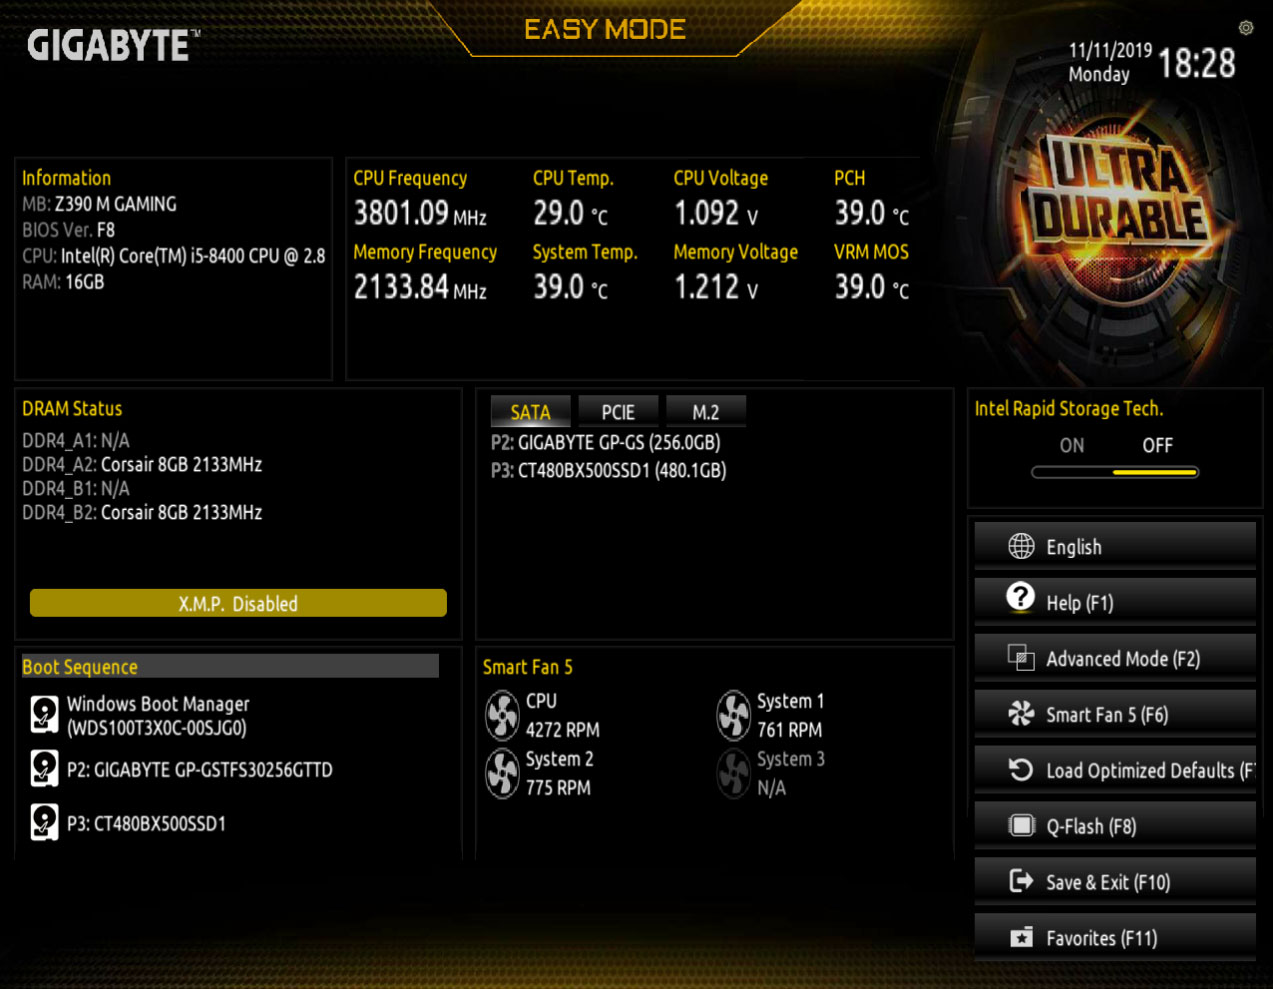
Step 3: Boot into the motherboards BIOS
We are now ready to load the BIOS. Reboot your computer and during the boot process, press the DELETE key on your keyboard to boot into the BIOS.
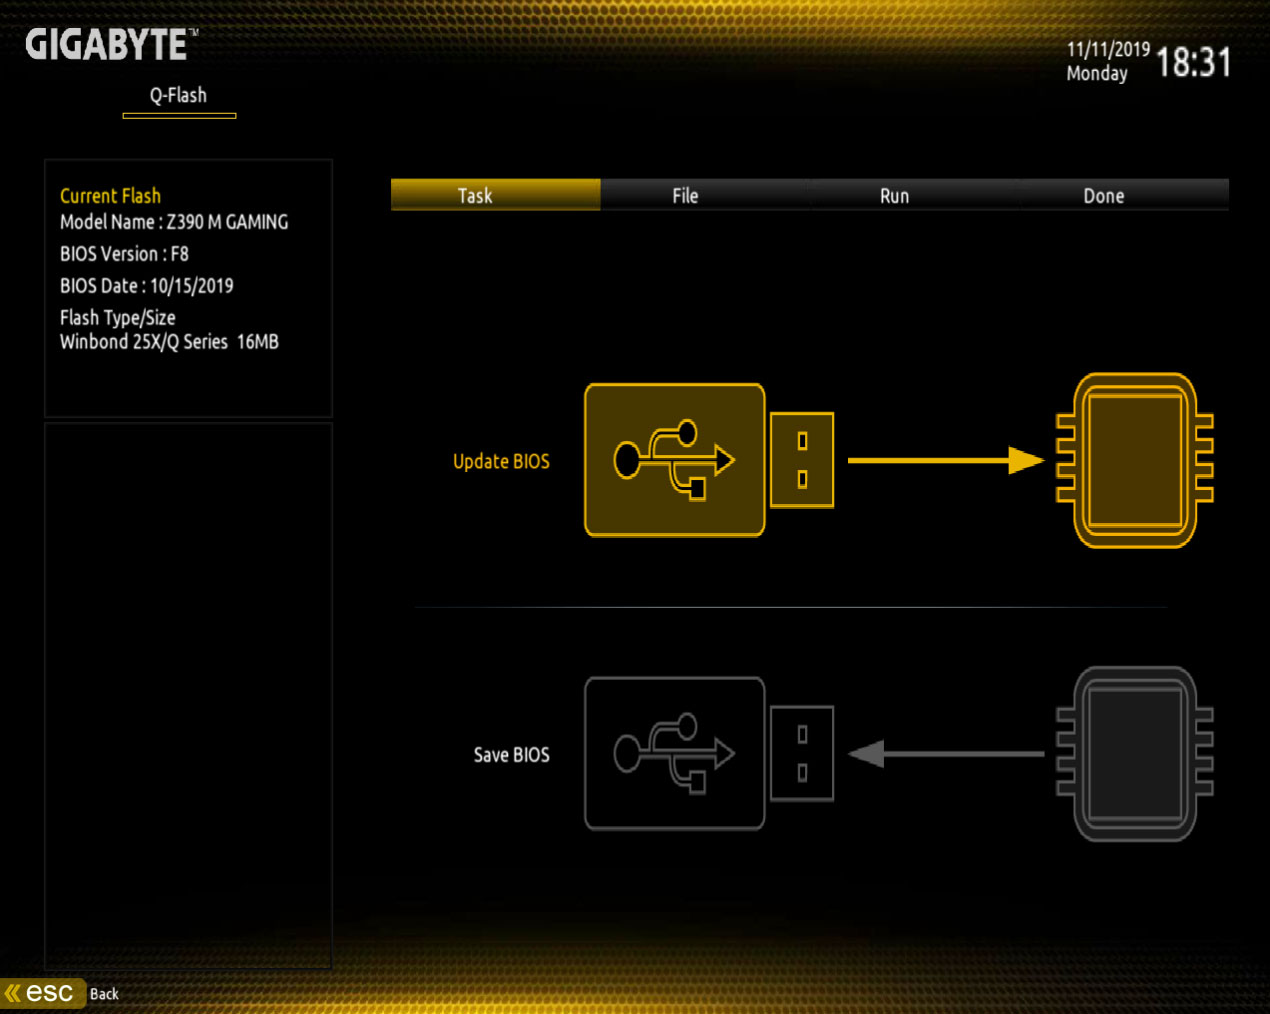
Step 4: Update the BIOS with Q Flash
Now that you are in the BIOS, press F8 on your keyboard to load Q-Flash. Once Q Flash has been loaded, select the Update Bios option.
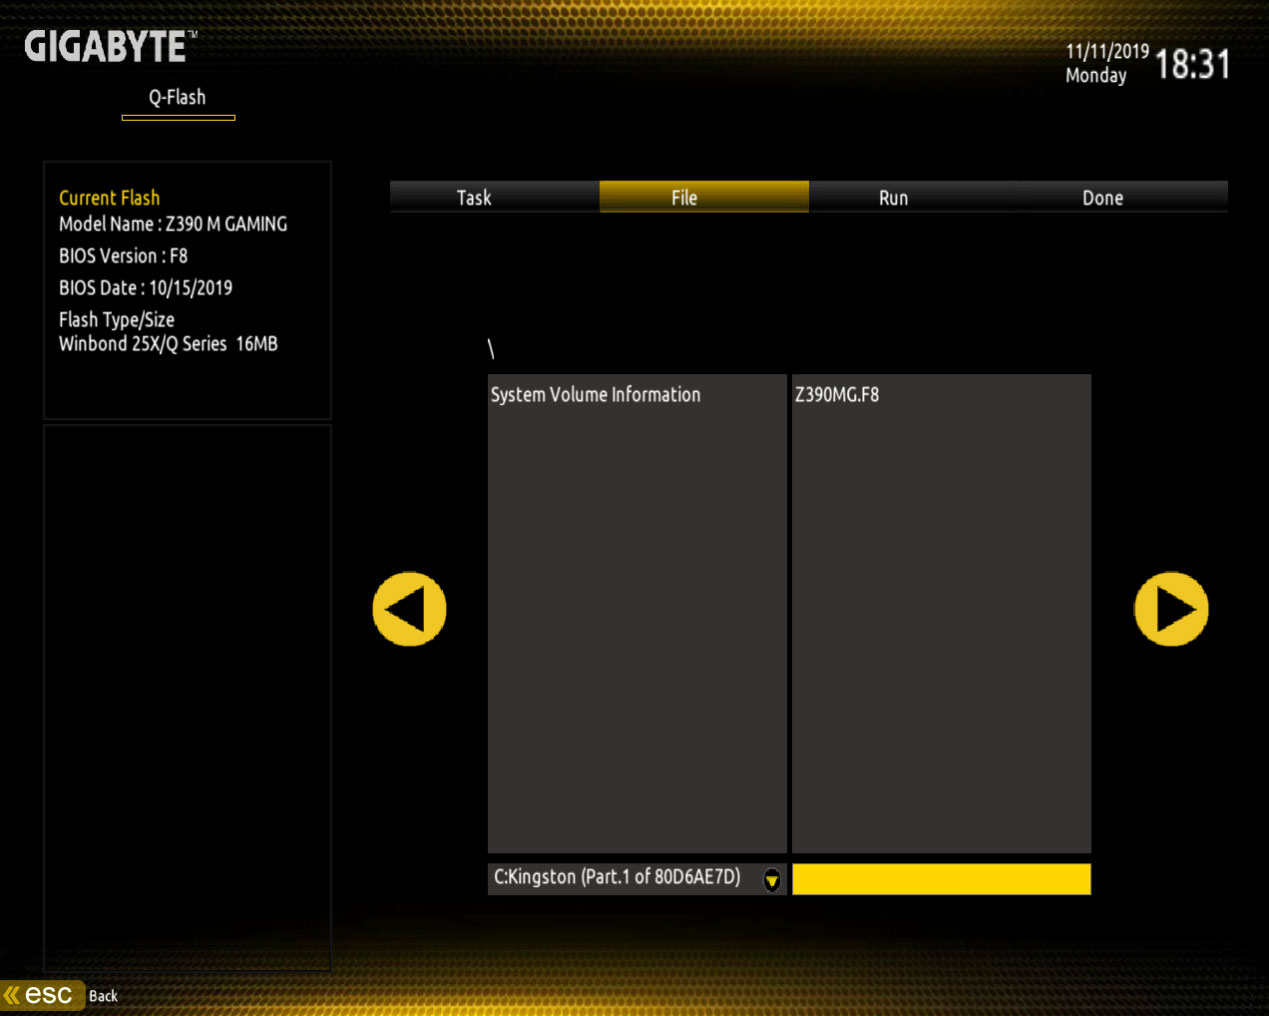
Next, select the BIOS update that you have stored on your USB drive.
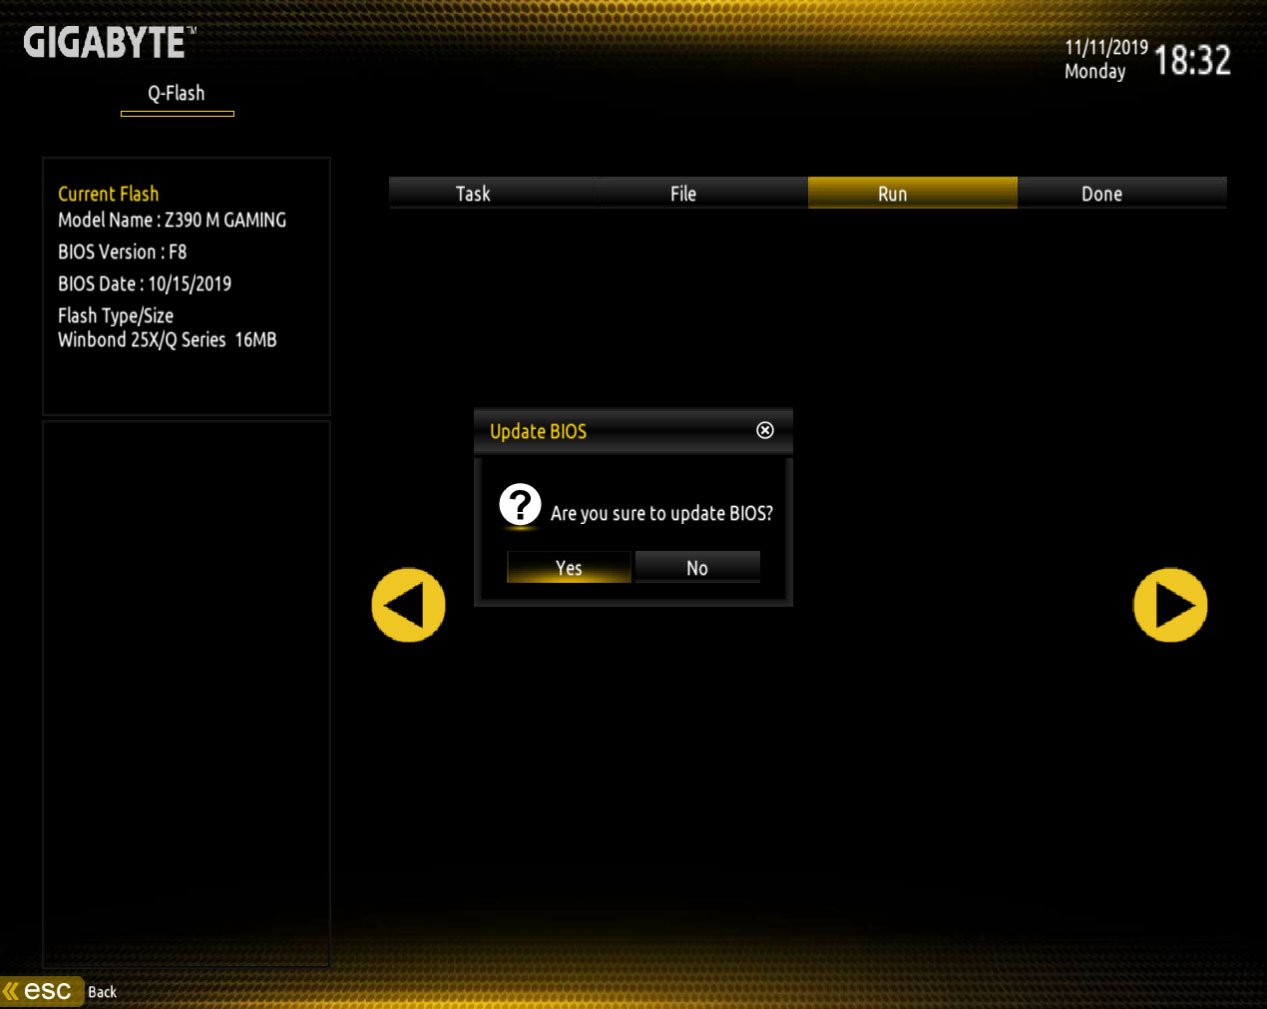
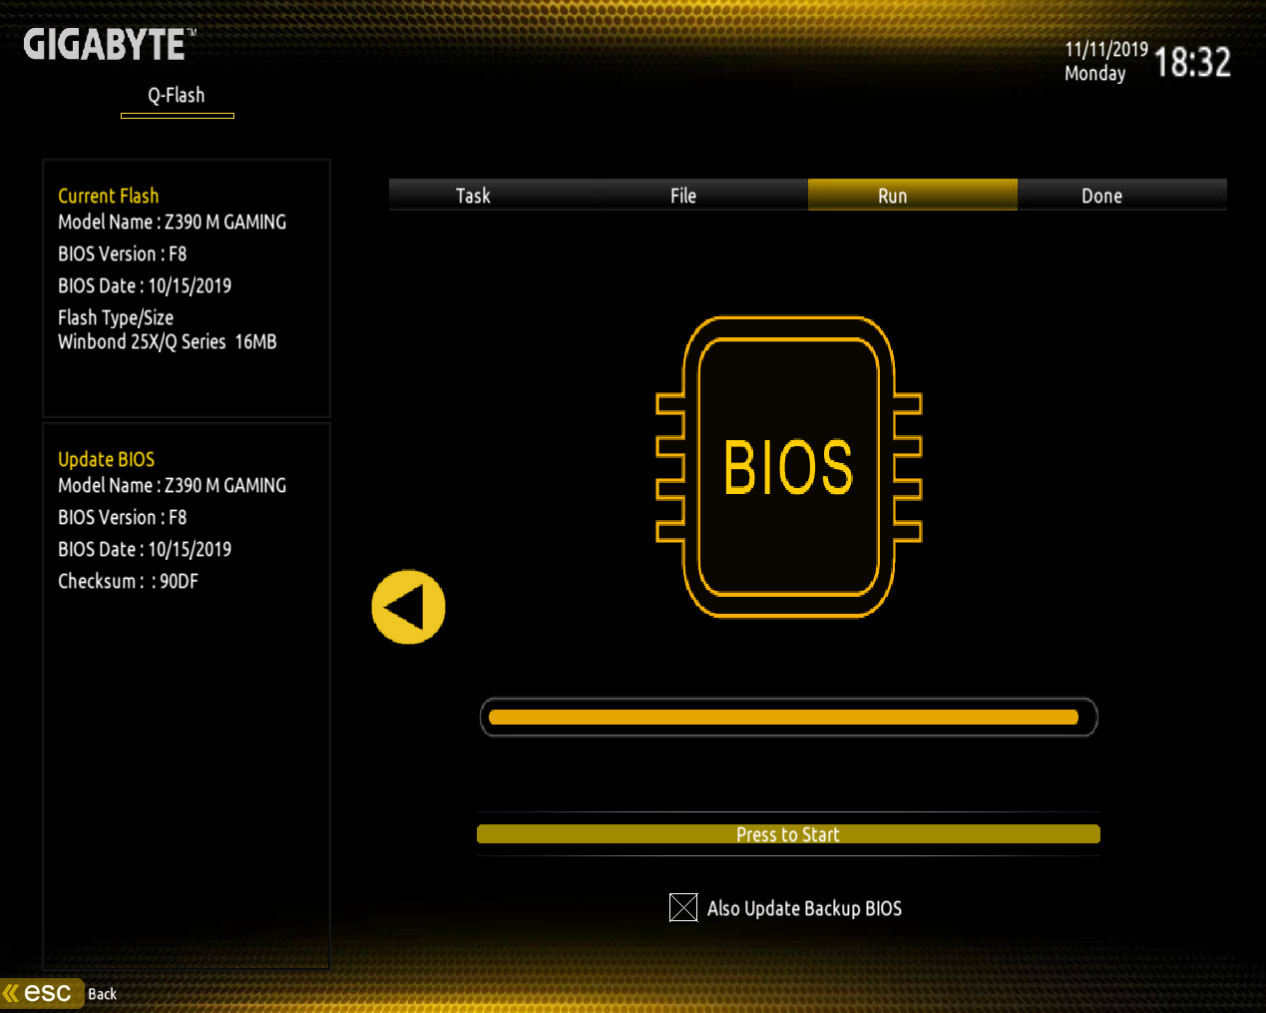
Once you have selected the BIOS update, you will be asked if you would like to proceed with the BIOS update.
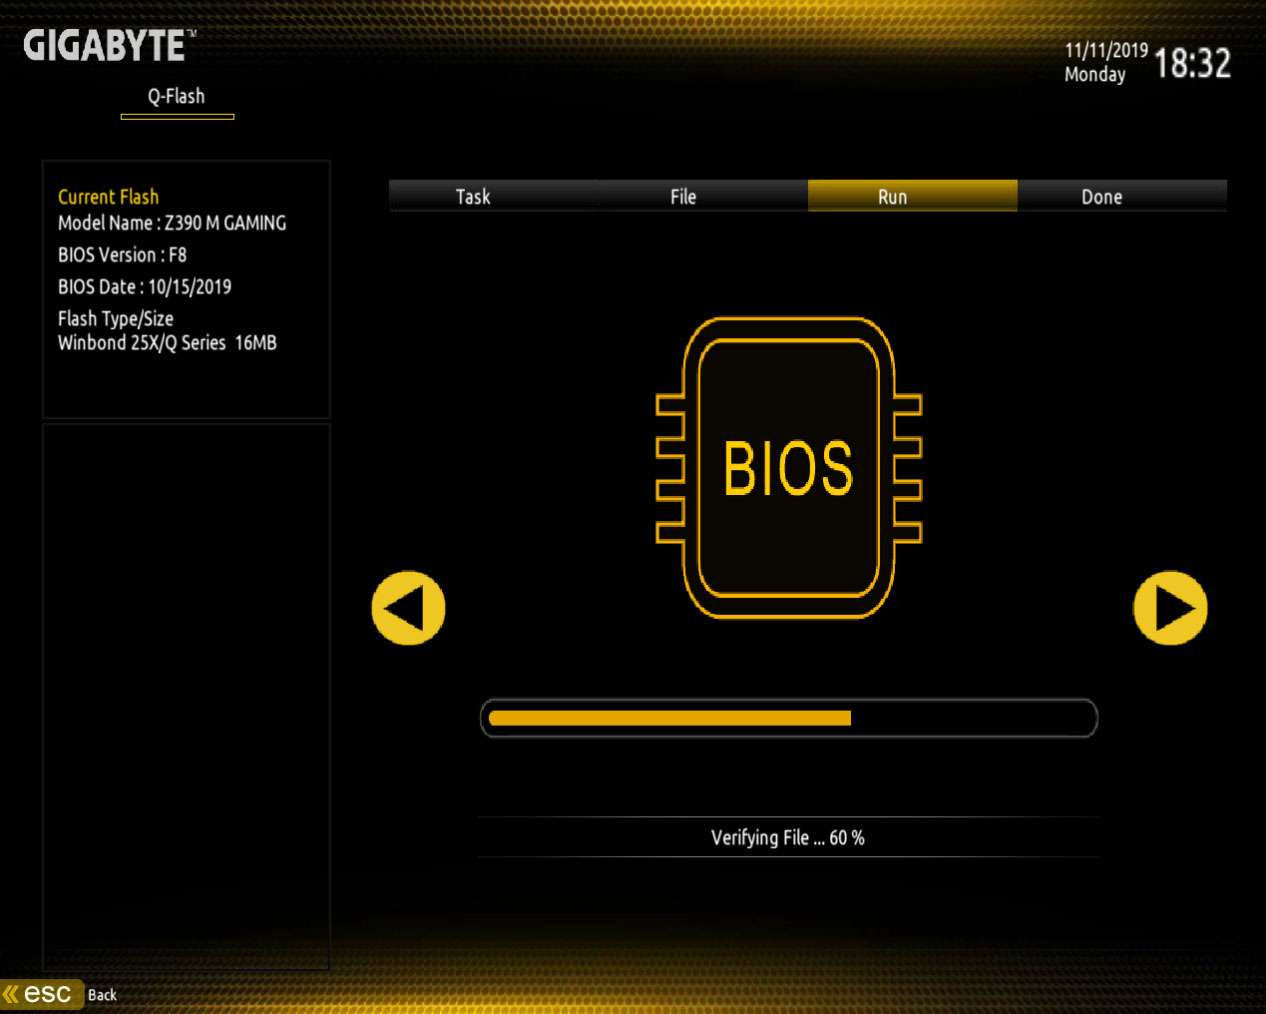
Click Yes, and the BIOS update shall be loaded and verified.
Once the file verification process has finished, click the Start button to start the update.
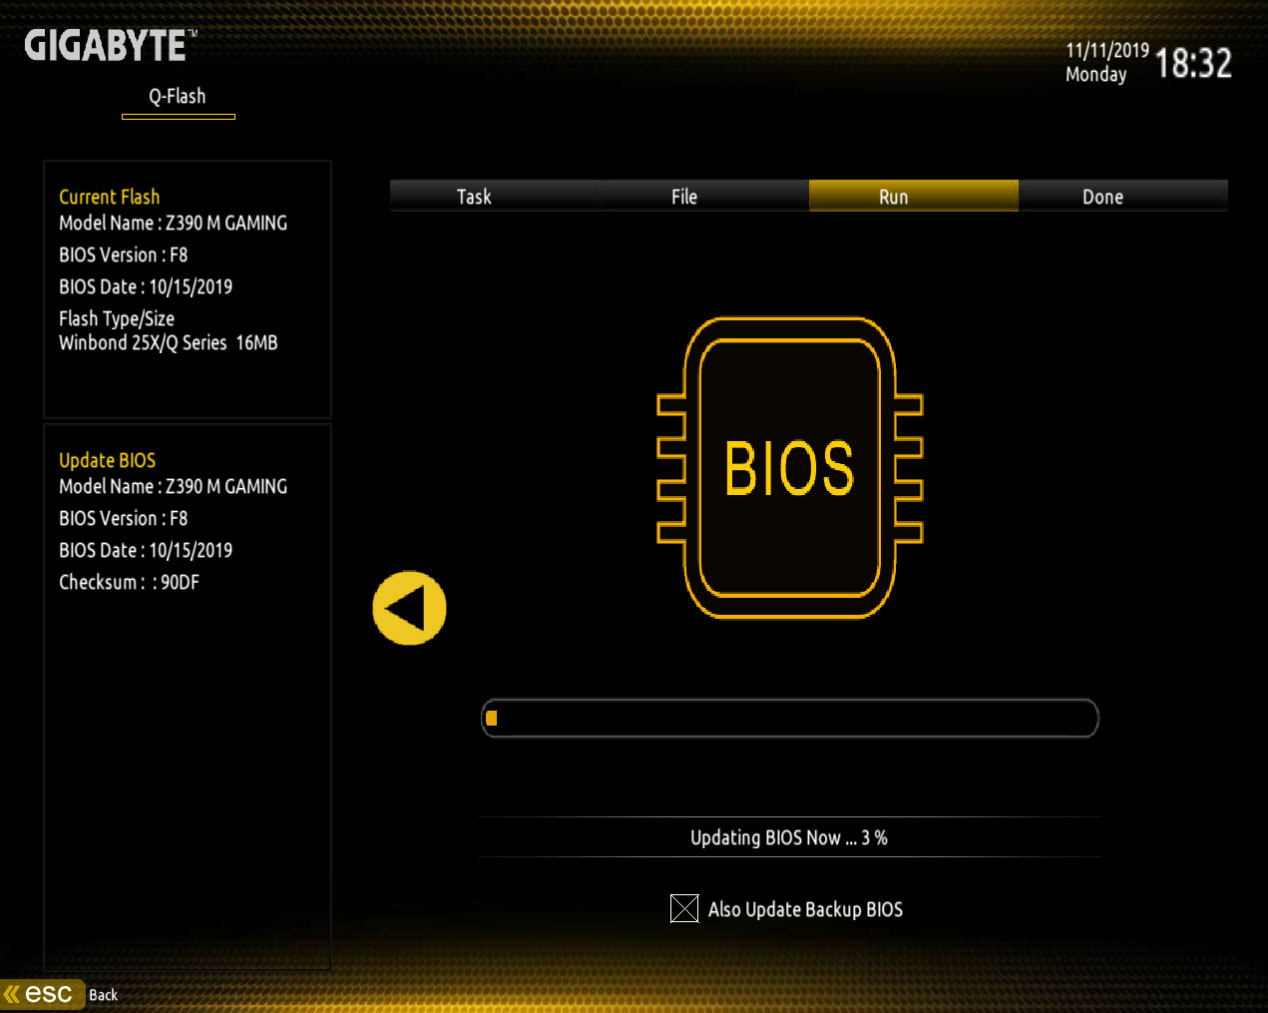
Q Flash shall now update the motherboard BIOS. The update may save several minutes and once completed, your computer will reboot.
Q Flash has now finished updating your motherboards BIOS.
The amazing DualBIOS and how to restore your BIOS should there be an issue
Sometimes things don’t always go according to plan, and mistakes can happen. There is often the time when someone mistakingly flashes the BIOS of the wrong motherboard, or some other unforeseen issue arises. Thankfully, AORUS has got you covered thanks to DualBIOS.
DualBIOS is a great feature whereby your motherboard has two BIOS onboard. There is the main BIOS that you use every day, and there is a backup BIOS.
The backup BIOS is there should your main BIOS ever encounter any issues. Should your main BIOS ever have an issue or become corrupted, the DualBIOS will kick in to save the day.
In the instance that your BIOS becomes corrupted, when you boot your computer, the backup BIOS will be loaded instead. This allows you to resume using your computer and allows you to work on fixing any main BIOS issues.
So, how do you go about fixing your BIOS issues should you encounter any? Well, the first thing to try is reflashing your BIOS with the latest, correct BIOS update using the @BIOS or Q Flash methods that we spoke about earlier. Generally, this is enough to resolve any issues you may be experiencing.
But what if both your main BIOS and the backup BIOS has stopped functioning? This is where Q flash Plus comes in.
Q-Flash Plus allows you to flash a working BIOs even your computer won't boot. It doesn’t even need a CPU or RAM to be installed!
The steps to utilizing Q-Flash Plus is very simple. Should your computer fail to boot, follow these steps.
Step 1: Prepare the USB drive
Download the latest BIOS version for your motherboard from the motherboard product page. Extract the downloaded BIOS file to the root of your flash drive. We need to rename the BIOS file so that Q-Flash Plus can find it. Rename the BIOS file to GIGABYTE.bin.
Step 2: Plug the USB drive into your computer
Now you need to plug the USB drive into the USB port that supports Q-Flash Plus. You will be able to find this in the manual of your motherboard.
Step 3: Flash the BIOS using Q-Flash Plus
Ensure that your power supply is connected to your motherboard and try and boot your computer. After about 20 seconds, Q-Flash Plus will notice that the computer is not booting correctly and will start the BIOS flashing process automatically.
You will see that the BIOS LED will start flashing on your motherboard which indicates that the BIOS flash is currently in progress. After a few minutes, the LED shall stop flashing which means that the BIOS flash has been completed.
Learn More:
How to Update Your BIOS Part 1: The @BIOS Utility