Level Up Your Visuals: Step-by-Step Guide to Update Your GIGABYTE Monitor Firmware

Step 1. Find the Product Model
There are two main ways to locate your monitor's product model:
-
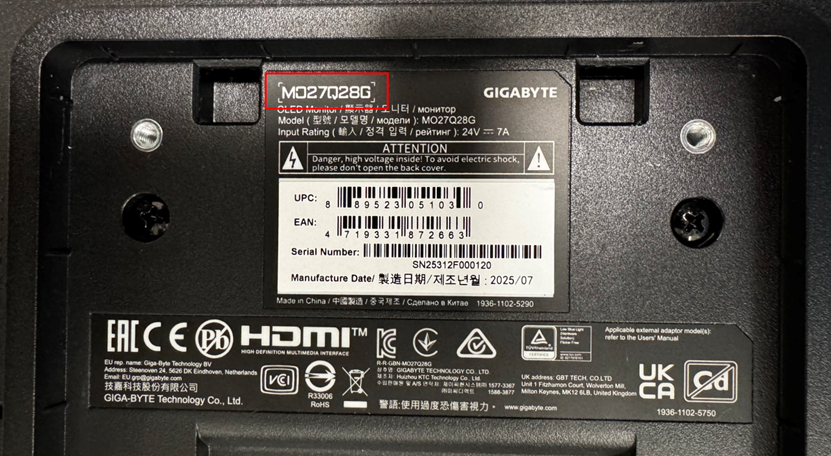
Via the Physical Label: The product information label is located on the back of the monitor unit (for example, MO27Q28G). Find the model name on this label. (Please refer to the illustrated guide below for visual reference.)
-
Via System Settings: You can also find the model by navigating to "Display Information" within your operating system's "Settings." (Please refer to the video tutorial for a demonstration of this method.)
.png)
Find the product model on the product information label.
Step 2. Download the Firmware File
Go to the official GIGABYTE website: https://www.gigabyte.com/
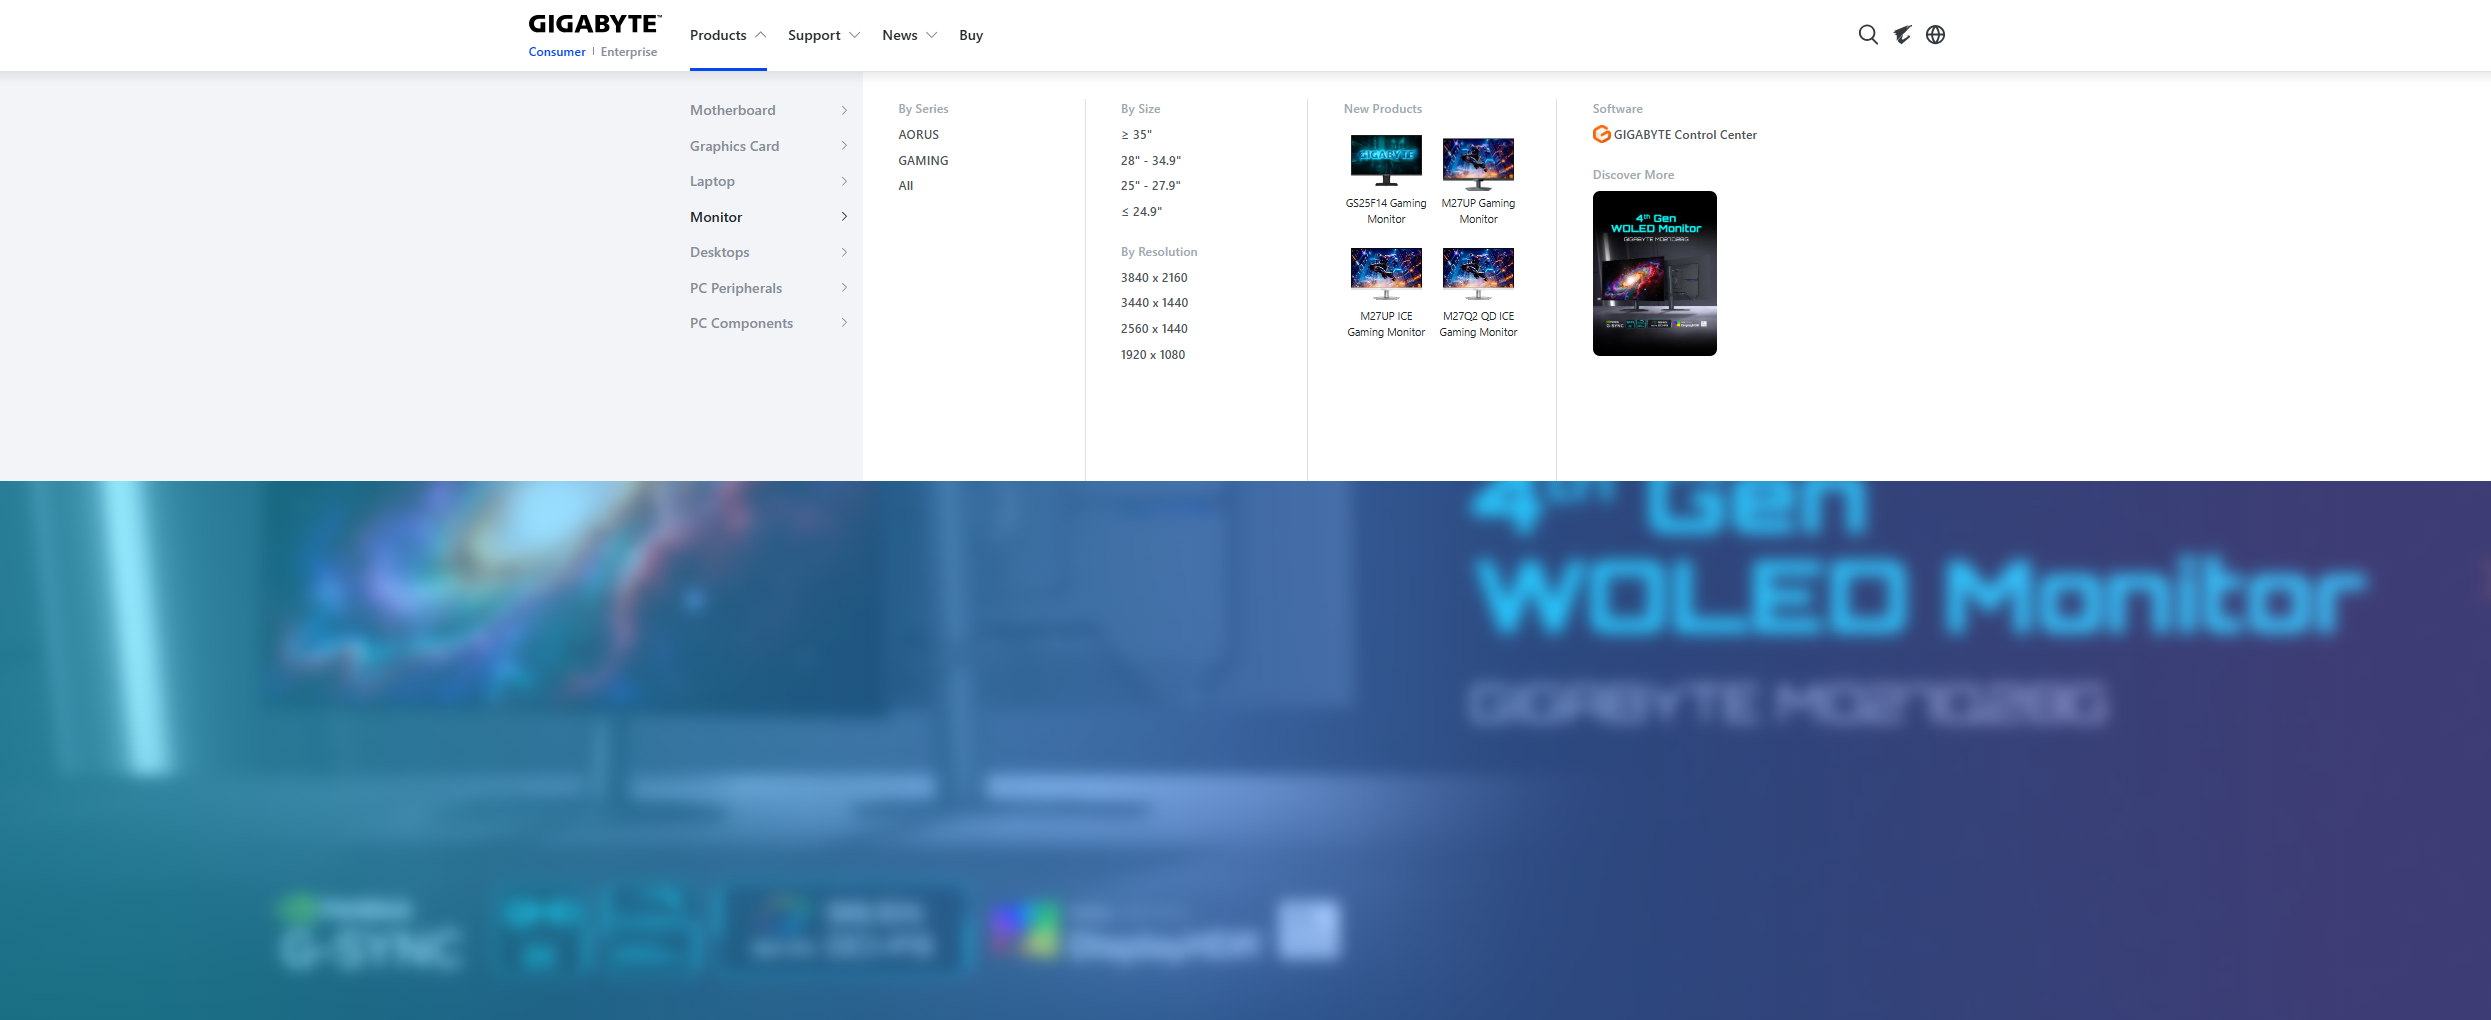
Select Product → Monitor.
Locate the corresponding product page according to your product model.
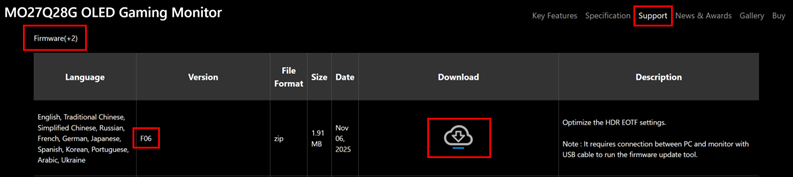
Under the Support section, click Firmware.
Find the required file and click Download.
Step 3. Extract the File
Locate the downloaded compressed file in your download folder and extract it.

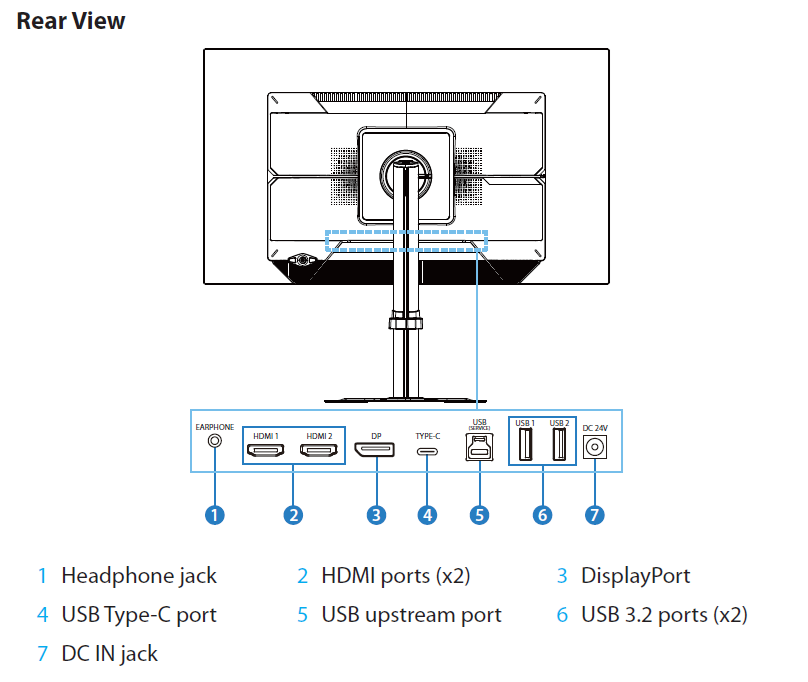
Step 4. Connect the USB Cable
Use the included USB cable to connect your operating device to the monitor’s upstream port.
Step 5. Run the Firmware Installation File
Double-click the extracted firmware executable file.

After launching, click Run to begin the firmware installation. The installer will check the device and USB connection status. Once the connection is complete, click OK to start the firmware update.
.png)
.png)
Do not turn off the monitor power during the firmware update. After the update is complete, click OK to finish the update process.
.png)
.png)